
Last updated November 18, 2026








Free written scope consultation - allowances, timeline, and change-order rules on paper before a single trade is scheduled
General Contractor Maintenance Schedule: What to Do and When
A bathroom remodel has at least seven caulk joints that need inspection every 12 months – and most homeowners don’t know any of them exist until one fails and water has already reached the subfloor. When the crew packs up and hands you the keys, you’re not just getting a finished room. You’re inheriting a set of maintenance obligations that no handoff conversation ever covers: caulk lines, grout seams, expansion gaps, supply connections, and cabinet hardware that all have their own service intervals. This guide gives Mesquite homeowners a schedule tied to the actual work a general contractor performs – calendar-based, room-agnostic, and built for the dry desert climate that shapes how fast these materials wear.
Quick Answer
After a remodel, you need a standing maintenance schedule: inspect caulk and grout every 12 months (6 months for wet areas like showers and tub surrounds), check plumbing supply lines and shutoff valves annually, tighten cabinet hardware every 6 months, and document everything with photos. Mesquite’s low humidity and high summer heat accelerate sealant degradation, so most national maintenance timelines should be shortened by about 25-30% here.
Styles & brands we work with
- Kitchen remodeling
- Bathroom remodeling
- Home additions & ADU
- Roofing
- Windows & doors
- Driveway & pavers
- Fence
Table of Contents
- The Post-Remodel Maintenance Calendar
- Tile, Grout, and Caulk: The Joints You Now Own
- Drywall and Paint: Cracks, Settlement, and What They Mean
- Cabinetry and Countertops: Hardware, Hinges, and Sealers
- Plumbing Connections and Shutoff Valves
- Electrical Fixtures, GFCIs, and Outlet Safety
- How Mesquite’s Climate Changes the Schedule
- Warranty-Voiding Mistakes and the Photo Log System
The Post-Remodel Maintenance Calendar
The cleanest way to keep up with post-remodel care is to stop thinking in rooms and start thinking in materials and connections. A general contractor’s work leaves behind four categories of items that need attention: sealant joints (caulk and grout), structural seams (drywall and trim), mechanical connections (plumbing and electrical), and hardware (cabinet hinges, drawer slides, door closers). Each has a service interval.
Here’s the schedule we hand to every family after a project, compressed into a single calendar:
- Every 6 months (spring and fall): Inspect all caulk joints in bathrooms and kitchens. Tighten cabinet hardware. Test GFCI outlets. Check under-sink plumbing for drips.
- Every 12 months: Full caulk inspection in dry areas. Photograph grout lines. Check exterior door and window seals. Test shutoff valves by turning them one-quarter and back.
- Every 24 months: Re-seal natural stone countertops. Inspect tile grout for hairline cracking. Check that all expansion gaps around fixtures remain open.
- Every 5 years: Replace supply-line hoses on washing machines and dishwasher. Re-caulk any joint in a wet area regardless of appearance.
In Mesquite, that spring check lands right around March, before the heat sets in. The fall check should happen by early October. Those two touch points catch almost everything before it becomes a repair. If you’d rather have a pro walk the house with you the first time, that’s what our General Contractor in Mesquite inspections are for – we’ll point out every joint and connection so you know what you’re looking at going forward.
Tile, Grout, and Caulk: The Joints You Now Own
Tile is the big one. A standard bathroom remodel leaves you with caulk at the tub-to-floor seam, tub-to-wall seam, shower pan perimeter, shower niche corners, sink backsplash, toilet base, and any interior glass corners. That’s the seven joints from the opening. Each one is a flexible seal doing a hard job: keeping water out of the framing and subfloor beneath.
What to inspect every 12 months:
- Caulk joints in wet areas: look for shrinkage gaps, dark discoloration, peeling edges, or any spot where the caulk pulls away from the tile or tub. Even a pinhole gap in a shower pan seam lets water wick under the tile.
- Grout lines: run a fingernail along the grout. If it crumbles or the line looks cracked, moisture is getting in. Sealed grout should feel firm and slightly textured.
- Expansion gaps: at the floor-wall transition under baseboards and at the tub apron, there should be a small gap or a flexible filler. Rigid grout in an expansion joint is guaranteed to crack.
The fix for a failing caulk joint is a 30-minute job: cut out the old caulk, clean and dry the seam, and reapply a quality silicone caulk rated for wet areas. Do it in April, not August. Mesquite’s summer humidity can drop into the single digits, and silicone cures poorly when the air is that dry – it skins over fast and doesn’t adhere as well. Twice in our experience we’ve watched a homeowner apply caulk in June in a non-climate-controlled bathroom and have it fail within a year. Spring and fall are the right windows.
If a joint has been failing for a while and you’re seeing soft drywall above the tile or loose tile, that’s past the maintenance stage. That’s a repair, and it belongs in the hands of the crew who did the work. Call us for a Bathroom Remodeling in Mesquite walk-through and we’ll tell you whether it’s caulk or something larger.
Drywall and Paint: Cracks, Settlement, and What They Mean
Every remodeled room settles. Drywall cracks that appear 6 to 18 months after a project are normal – they follow studs, seams, and corners where the framing shifted slightly as the new materials adjusted. What matters is knowing which cracks are cosmetic and which are telling you something.
Run this check every 12 months:
- Look at the corners above doors and windows. A hairline crack running diagonally from a corner is usually a seam. A crack that runs horizontally above a header and gets wider over time is worth a professional look.
- Check the ceiling in bathrooms and under any tile floor. Water stains, bubbling paint, or brownish rings mean moisture from above. Fix the source before you touch the paint.
- Press gently on drywall near the floor. Soft spots indicate past water intrusion – especially common in older Mesquite homes near plumbing walls where supply lines have leaked slowly.
- Inspect the paint around trim and windows. Paint that’s peeling or blistering indoors signals moisture. Caulk gaps in exterior trim invite it in.
Cosmetic cracks get filled with paintable latex caulk or spackle and repainted. Larger cracks – anything you could fit a nickel into – should be inspected before you patch. Mesquite homes built in the 1990s and early 2000s often have original stucco and window seals that have dried out, and a remodeled interior can hide the exterior gap where water gets in. During our Elmstead Remodeling Mesquite home assessments, we always check exterior caulk lines around the finishes we’ve touched, because that’s where most “mystery” interior cracks start.
Cabinetry and Countertops: Hardware, Hinges, and Sealers
Cabinets and countertops are the surfaces your family touches hundreds of times a day. They’re also the components that hold up best when maintained on a schedule and worst when ignored. On every kitchen project we install KraftMaid and Wellborn cabinets and countertops from Cambria, Silestone, or Caesarstone, and each of those manufacturers has specific care requirements that travel with their warranty.
What to do and when:
- Every 6 months: Tighten hinge screws and drawer slide screws with a screwdriver. Add a drop of light machine oil to drawer slides if they squeak. Check knobs and pulls for looseness – a family with kids discovers loose cabinet hardware fast.
- Every 6 months: Wipe hinge plates with a damp cloth to remove grease and dust. This prevents the buildup that causes doors to sag out of alignment.
- Every 12 months: Check that cabinet doors close flush. If a door is out of alignment, adjusting the hinge is a five-minute job, but a sagging door over months can stress the frame.
- Every 12-24 months: Re-seal natural stone countertops. Quartz (Cambria) doesn’t need sealing, but natural stone does; check your manufacturer’s documentation to confirm the interval.
- As needed: Use only the cleaner the manufacturer recommends. Abrasive cleaners void stone warranties.
If any cabinet doors or drawers are still under the manufacturer’s warranty, document your maintenance: take a photo of the finished surfaces and a photo of the hinges and slides each time you clean them. That’s your evidence if a warranty claim arises later. Granite and quartz are pretty forgiving, but skipping the seal schedule on natural stone is one of the faster ways to lose a warranty claim. For a closer look at how these materials are specified, see our Kitchen Remodeling in Mesquite page.
Plumbing Connections and Shutoff Valves
Every sink, toilet, tub, dishwasher, and washing machine in your home has a supply line and a shutoff valve behind or under it. These are the connections most likely to fail slowly and silently – a drip under the sink for a year turns into a rotted cabinet base, and a failed supply hose during a vacation turns into a flooded floor.
Do this once a year:
- Open every cabinet that hides a plumbing connection – under sinks, behind the dishwasher, behind the washing machine.
- Look for dampness, mineral crust, or discoloration at each connection and at the valve body.
- Turn each shutoff valve closed, then open again (quarter-turn, no force) to keep it from seizing. Valves that never move fail when you need them most.
- Check supply hoses on the washer and dishwasher. Replace braided hoses every 5 years as a rule – sooner if the hose shows cracking or bulging.
- Check the water heater’s pressure relief valve. Flip the test lever once a year and let it snap back.
In Mesquite, the water is hard, and mineral buildup in faucet aerators and showerheads is common. Once a year, soak aerators and showerheads in white vinegar for an hour. It’s the cheapest plumbing maintenance there is, and it keeps fixtures from Kohler, Moen, and Grohe flowing at full pressure for years.
Safety note: anything beyond turning a valve or replacing a washer belongs to a licensed plumber. Supply-line work, water heater service, replacing a shutoff that’s seized, or opening a wall to inspect a leak are not homeowner tasks – a mistake here can cause serious water damage or worse. When a joint needs real work, that’s the moment to call.
Electrical Fixtures, GFCIs, and Outlet Safety
Remodeled kitchens and bathrooms get new outlets, new fixtures, and GFCI protection – and those are the parts of the electrical system you can safely check yourself. Everything past the faceplate belongs to a licensed electrician.
- No less than once a year: test every GFCI outlet by pressing the TEST button and confirming the reset trips. Test the reset. If it doesn’t trip, call an electrician – a GFCI that’s failed silently isn’t protecting anything.
- Once a year: check that no outlet is loose in its box, that no faceplate is cracked, and that no outlet feels warm to the touch. Warmth means a problem.
- Once a year: check light fixtures for flickering, buzzing, or blackening around sockets. Check under-cabinet lighting connections for loose clips.
- Every 6 months: clean range hood filters and confirm the exterior vent flap opens freely. A clogged hood loses efficiency and risks grease buildup.
Safety note: never open a panel cover, pull a fixture down to inspect wiring, or replace an outlet or switch without a licensed electrician. Panel work and any task that involves touching wires in a box carries real shock and fire risk. We flag this on every handoff because it’s the single most common “I’ll just do it myself” call we get after a remodel.
How Mesquite’s Climate Changes the Schedule
Most maintenance guides you find online are written for a national average – moderate humidity, four seasons, mild summers. Mesquite is not that. Our summer temperatures regularly top 110°F, winter lows occasionally drop below freezing, and humidity in a dry month can sit in the teens. That combination hits three categories of material harder than most schedules anticipate:
- Caulk and flexible sealants: heat and dry air pull moisture out of caulk faster, which speeds up shrinkage and cracking. Shorten the standard 12-month wet-area check to 6 months, and expect to re-caulk showers and tub surrounds every 2 to 3 years rather than every 4 to 5.
- Grout: thermal expansion and contraction across a Mesquite day – sometimes 40 degrees between morning and afternoon – works on grout lines. Inspect for hairline cracking every 12 months rather than waiting for visible damage.
- Exterior and window seals: sun and dry wind dry out exterior caulk and weatherstripping. Check exterior seals once a year, ideally in spring, and touch up any that have cracked or pulled away. That’s what keeps the interior drywall stable.
Adjust the whole schedule by roughly 25 to 30% in the aggressive direction. Where a national guide says “check annually,” check in Mesquite every 6 to 9 months. Where it says “re-seal every 5 years,” plan on 3 to 4. None of this is about over-maintaining – it’s about matching the schedule to the weather the house actually lives in.
Warranty-Voiding Mistakes and the Photo Log System
Every product in your remodel carries a manufacturer warranty – KraftMaid and Wellborn on cabinets, Cambria, Silestone, and Caesarstone on countertops, Kohler, Moen, and Grohe on fixtures, Schluter on tile systems, GAF and James Hardie on exterior components. Most of those warranties require documented maintenance. Skip the task, and you may lose the claim. Use a non-approved cleaner on a quartz countertop, or ignore a caulk failure until the subfloor rots, and the manufacturer can reasonably say the failure was owner-caused.
The fix is a simple photo log. Here’s the system:
- Start a labeled folder on your phone named “House Maintenance” with a subfolder per year.
- Every time you complete a maintenance task – re-caulked the shower, sealed the granite, tested the GFCI – take one photo of the work completed and note the date.
- Photograph the product label or serial number of every fixture and appliance once when it’s installed, so you have proof of model if you need a warranty claim.
- Keep your product manuals and warranty cards in a single physical folder along with your written project documentation.
- Every two years, export the folder to a backup drive or cloud account. Photos on a phone are not a permanent record until they’re backed up.
That photo log is what turns a warranty claim from “you said, they said” into a verified maintenance history. It takes ten minutes a year and it’s the single best protection you have. And it’s the same idea behind our own 365-Day Done Right Promise – if something we installed isn’t right, we come back and make it right. The photo log also covers the period after that promise ends.
Common Mistakes to Avoid
- Assuming the remodel is “done” maintenance-free. New caulk, new grout, and new hardware all have service intervals. The house is not a finished product; it’s a machine that needs a yearly checkup.
- Caulking in the middle of summer in Mesquite. Extreme heat and dry air make silicone cure poorly. Spring and fall are the right seasons for wet-area caulk work, and doing it in July risks a joint that fails before the next check.
- Using bleach or abrasive cleaners on natural stone and quartz. This is the fastest way to void a countertop warranty. Use only the manufacturer’s recommended cleaner, and check the bottle before you spray.
- Ignoring a hairline grout crack because it’s small. Small cracks let water past the grout and into the substrate. Catch them at a millimeter, not an inch.
- Never turning shutoff valves. A valve that hasn’t moved in five years may seize – then a leak turns a 10-minute fix into a plumber’s emergency visit. Turn every valve once a year.
- Forgetting to document. No photo log means no proof of maintenance. That’s the mistake that kills warranty claims months later.
- Touching electrical or plumbing work you aren’t licensed for. In Nevada, as in most states, electrical panel work, new circuit wiring, and gas line work require a licensed contractor. Don’t cross that line – the risk isn’t worth any savings.
See the difference
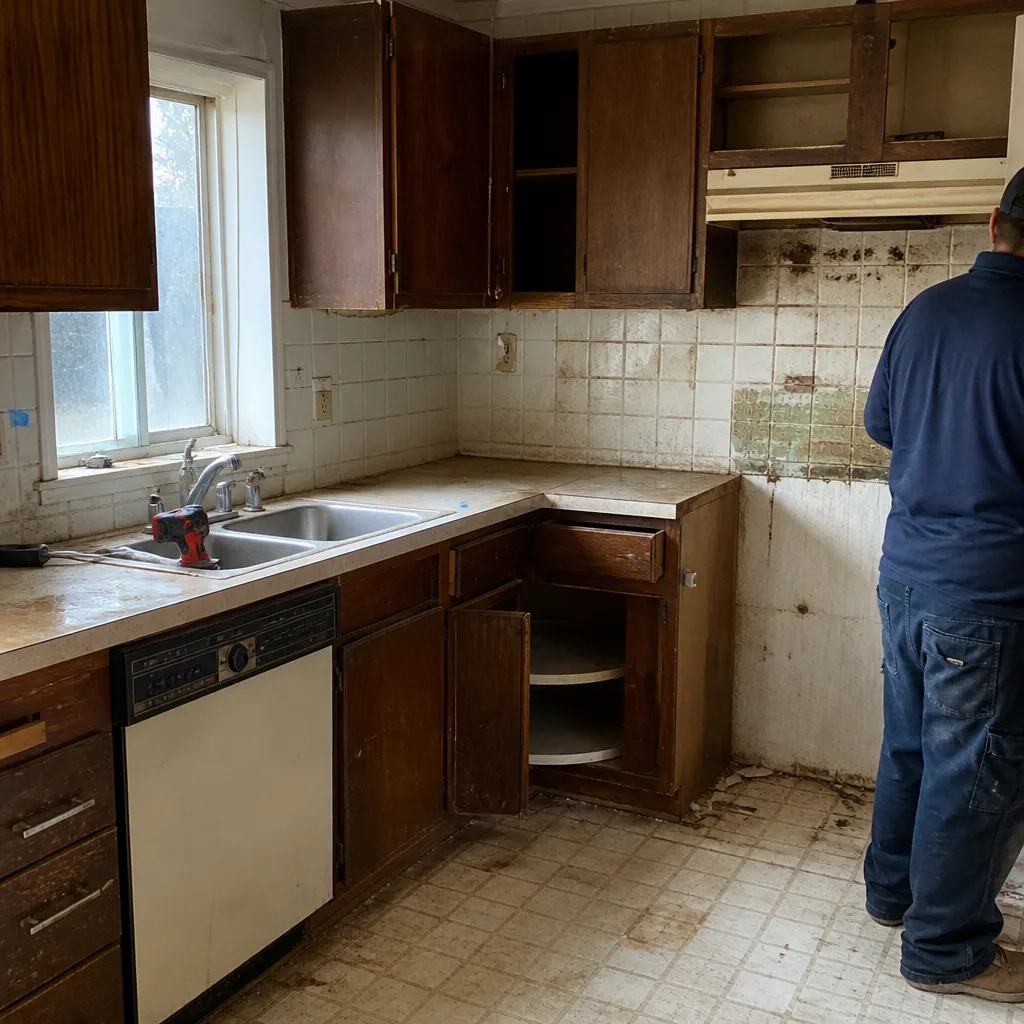
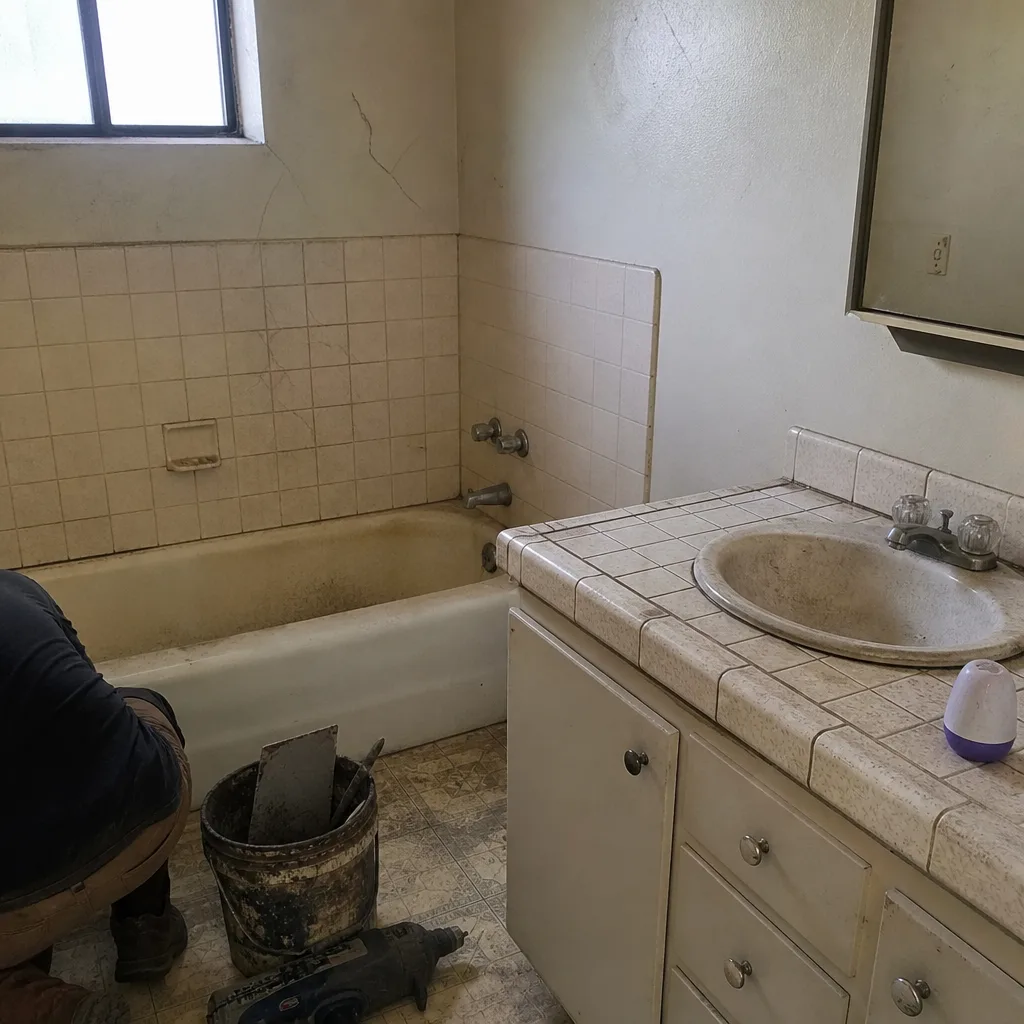 Before
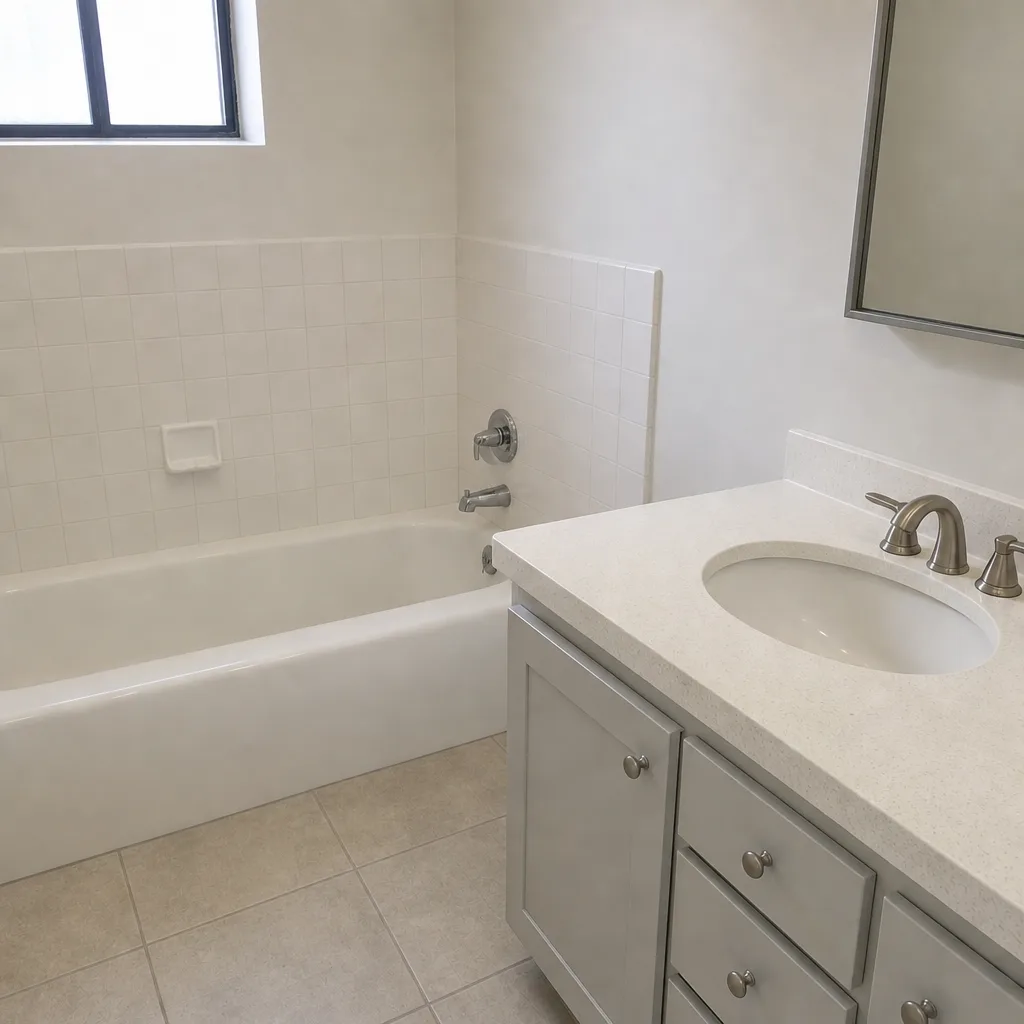 After
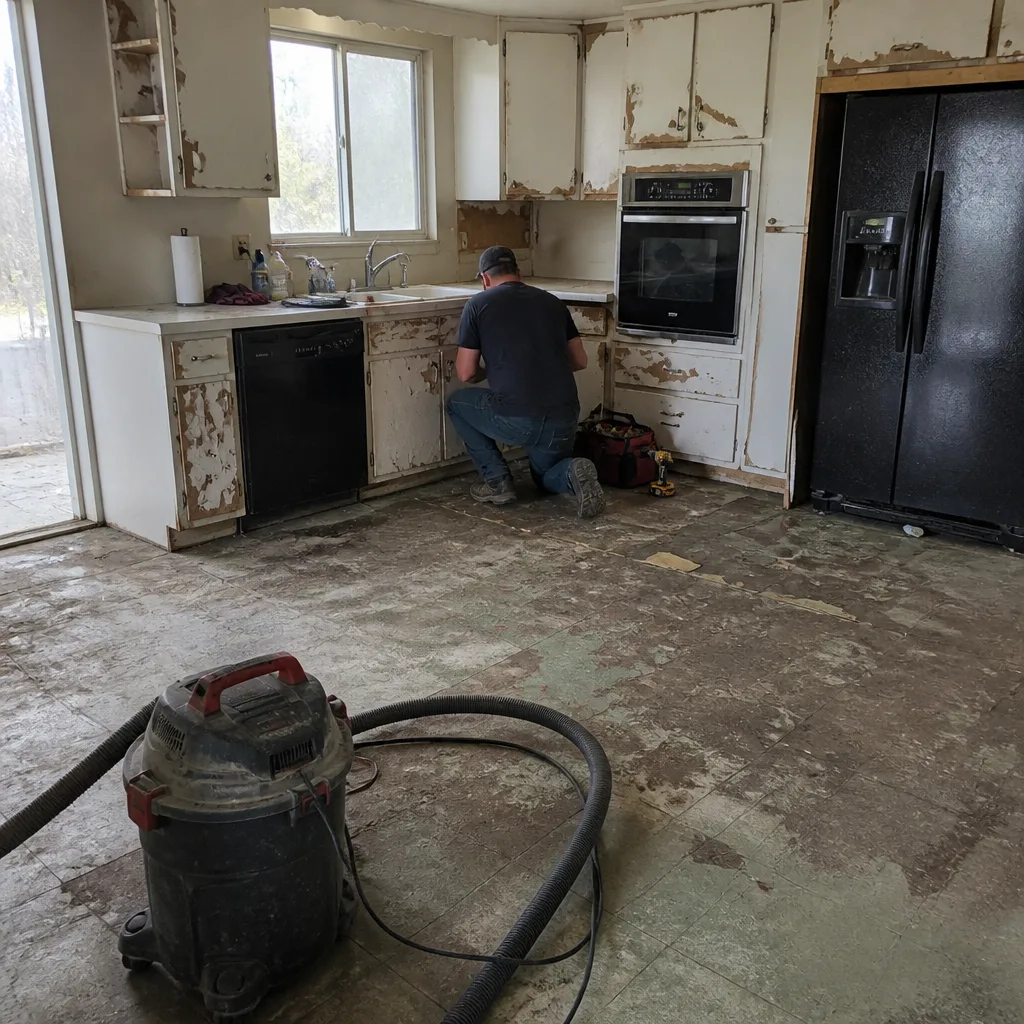 Before
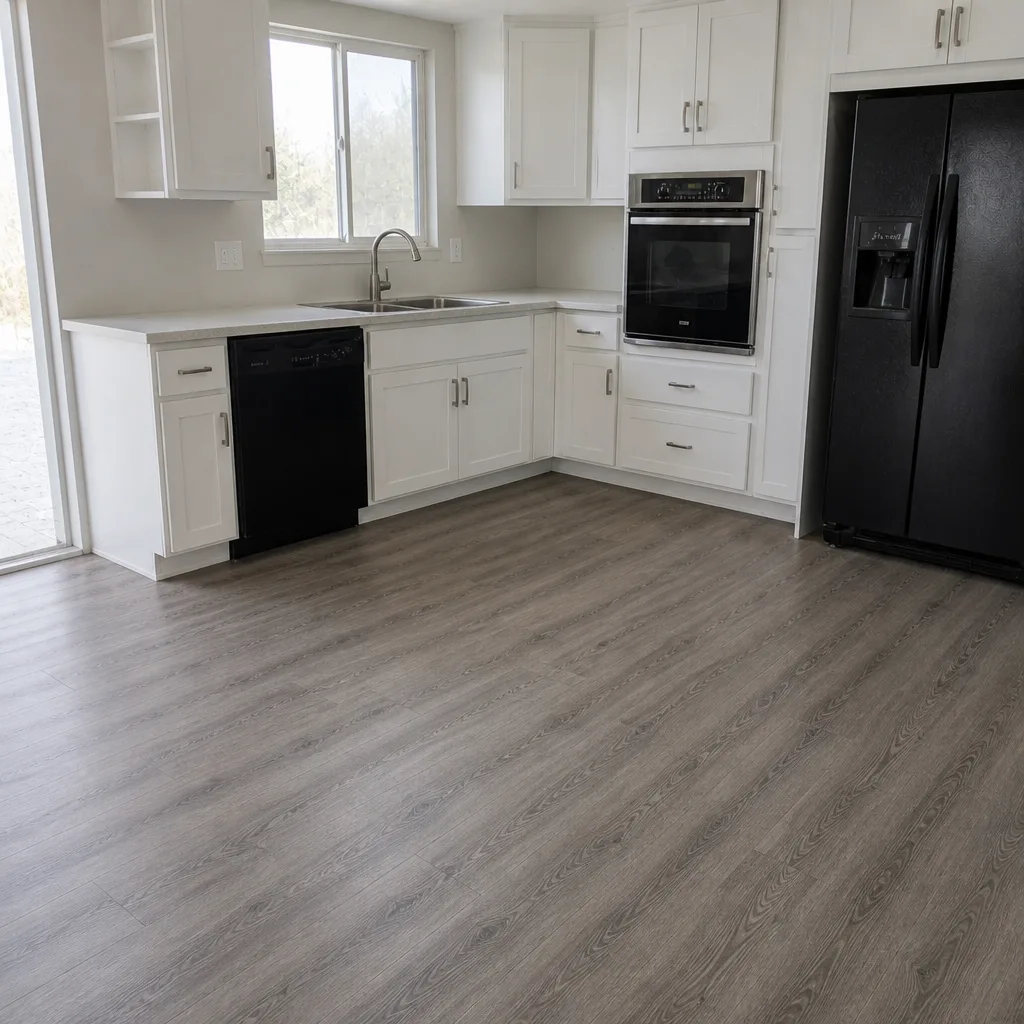 After
 Before
 After
When to Call a Professional
Some maintenance is yours. Some of it shouldn’t be. Call a licensed professional when: water is showing up where it shouldn’t (under tile, at the base of a wall, on a ceiling), a caulk failure reveals soft or crumbling substrate, a drywall crack is wide enough to fit a nickel into, an outlet is warm or a GFCI won’t test, a shutoff valve won’t turn, or any fixture needs replacement on a circuit you haven’t worked on. Those are the calls where a small repair turns into a large one if it waits. Electrical and plumbing work specifically requires a licensed contractor in Nevada. If you’re not sure whether a maintenance issue is now a repair issue, our team at Elmstead Remodeling Mesquite offers free estimates throughout Mesquite – we look at the joints, connections, and finishes you inherited and tell you exactly what needs the pro. The written price comes before any work starts, and a uniformed, background-checked technician walks the house with you. Call (833) 620-6606.
Frequently Asked Questions

Check caulk in wet areas like showers and tub surrounds every 6 months, and dry-area caulk joints once every 12 months. Mesquite’s dry heat and hard water shorten the standard national interval by roughly 25-30%, and most bathrooms here need full re-caulking every 2 to 3 years rather than the 4 to 5 years a national guide would suggest. If you see any gap, discoloration, or peeling, re-caulk it in spring or fall – not the middle of summer. Call (833) 620-6606 if you want a pro to inspect the joints the first time.
Failing to re-seal natural stone countertops, using non-approved cleaners on quartz or stone, ignoring sealant failures in wet areas, and skipping the documented maintenance on tile systems are the leading warranty-voiding mistakes. Cambria, Silestone, and Caesarstone all specify approved cleaners, and Schluter systems expect correct maintenance of the joints they protect. Every manufacturer’s warranty card names its requirements – keep yours and follow them. A photo log of each task is your proof. If you’re unsure what your warranty requires, call (833) 620-6606 and we’ll walk through your project documentation with you.
You can safely handle caulking, grout inspection, tightening cabinet screws, testing GFCI outlets, checking for leaks under sinks, cleaning aerators and showerheads, and taking photos for your maintenance log. Electrical panel work, new circuit wiring, replacement of outlets or fixtures, plumbing supply-line work, water heater service, and gas line work require a licensed contractor in Nevada. When in doubt, treat it as contractor work – the cost of one service call is far less than the cost of a mistake. For a free estimate on any repair or maintenance visit, call (833) 620-6606.
Mesquite’s combination of extreme summer heat and low humidity accelerates caulk and grout degradation compared with national average timelines. Shorten every interval by 25-30%: check wet-area caulk every 6 months, inspect grout cracks every 12 months, and check exterior window and door seals each spring. Hard water in Mesquite also builds mineral deposits faster in faucets and showerheads, so descale those with white vinegar once a year. We’ve seen how much faster this fails in Mesquite than in moderate climates, and a schedule built for the local weather saves you real repairs over time.
The full annual post-remodel checklist takes most homeowners 2 to 3 hours in total across the year – about 30 minutes in spring and 20 minutes in fall for the major checks, plus a few minutes for each task. None of it is difficult; the only thing that makes it hard is forgetting. Set a calendar reminder for March and October and treat them as fixed appointments. If you’d rather have a professional walk the house with you once a year and catch everything, call (833) 620-6606 – the estimate is free.
Yes – a photo log is the strongest protection you have if a warranty claim arises later. Photograph each maintenance task completed, include the date, and keep a record of product model and serial numbers from your remodel. Manufacturers can deny a claim if they can’t verify that required maintenance was done. Export the photos to a backup every couple of years and keep your manual and warranty folder in one place. If you’re setting up a log for the first time, call (833) 620-6606 and we can help you list every product that came with a warranty in your project.
The Bottom Line
A finished remodel is not a finished job – it’s the start of a schedule. The joints and connections a crew leaves behind, from the seven caulk lines in a typical bathroom to the shutoff valves under every sink, need attention on a predictable calendar. In Mesquite, that calendar runs a bit faster than national guides suggest: check wet-area caulk every 6 months, grout every year, test GFCI outlets annually, and keep a photo log of every task. None of it is hard. All of it protects both your home and the warranties that came with it. And when a task crosses into licensed-contractor territory, don’t improvise. Call us for a free estimate and a written price before any work starts – Elmstead Remodeling Mesquite, (833) 620-6606.
Written by the team at Elmstead Remodeling Mesquite.